A log burner can become the heart of your living space, especially during the colder months. However, if you’re like many who enjoy the warmth of a fire, you might also struggle with how to store your logs and kindling without cluttering the room. A bespoke log storage unit offers a perfect blend of functionality and style, keeping your wood neatly stacked while adding a touch of character to your space. In this guide, I’ll walk you through the construction of a custom-made unit that includes dedicated kindling shelves, a sturdy hardwood top capable of supporting a fish tank, and a matching wall-mounted shelf—all spray-painted to fit your room’s color scheme.
Materials and Tools You’ll Need
- MDF board (Medium-Density Fibreboard)
- Hardwood plank (for the top)
- Wood glue
- Screws
- Wood filler
- Router (for rounding edges and custom detailing)
- Table saw or circular saw (for cutting the MDF)
- Measuring tape
- Clamps
- Electric drill
- Sandpaper
- Spray paint (in your chosen color)
- Polyurethane varnish (to finish the hardwood top)
- Masking tape (for clean paint lines)
Step 1: Plan and Measure the Unit
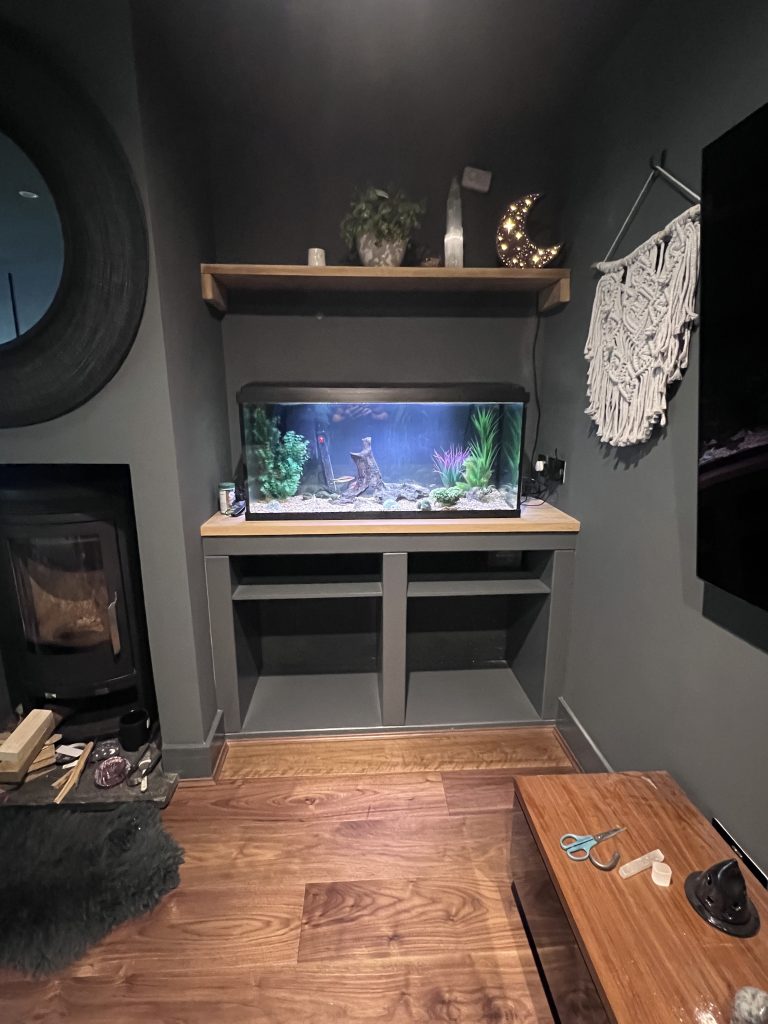
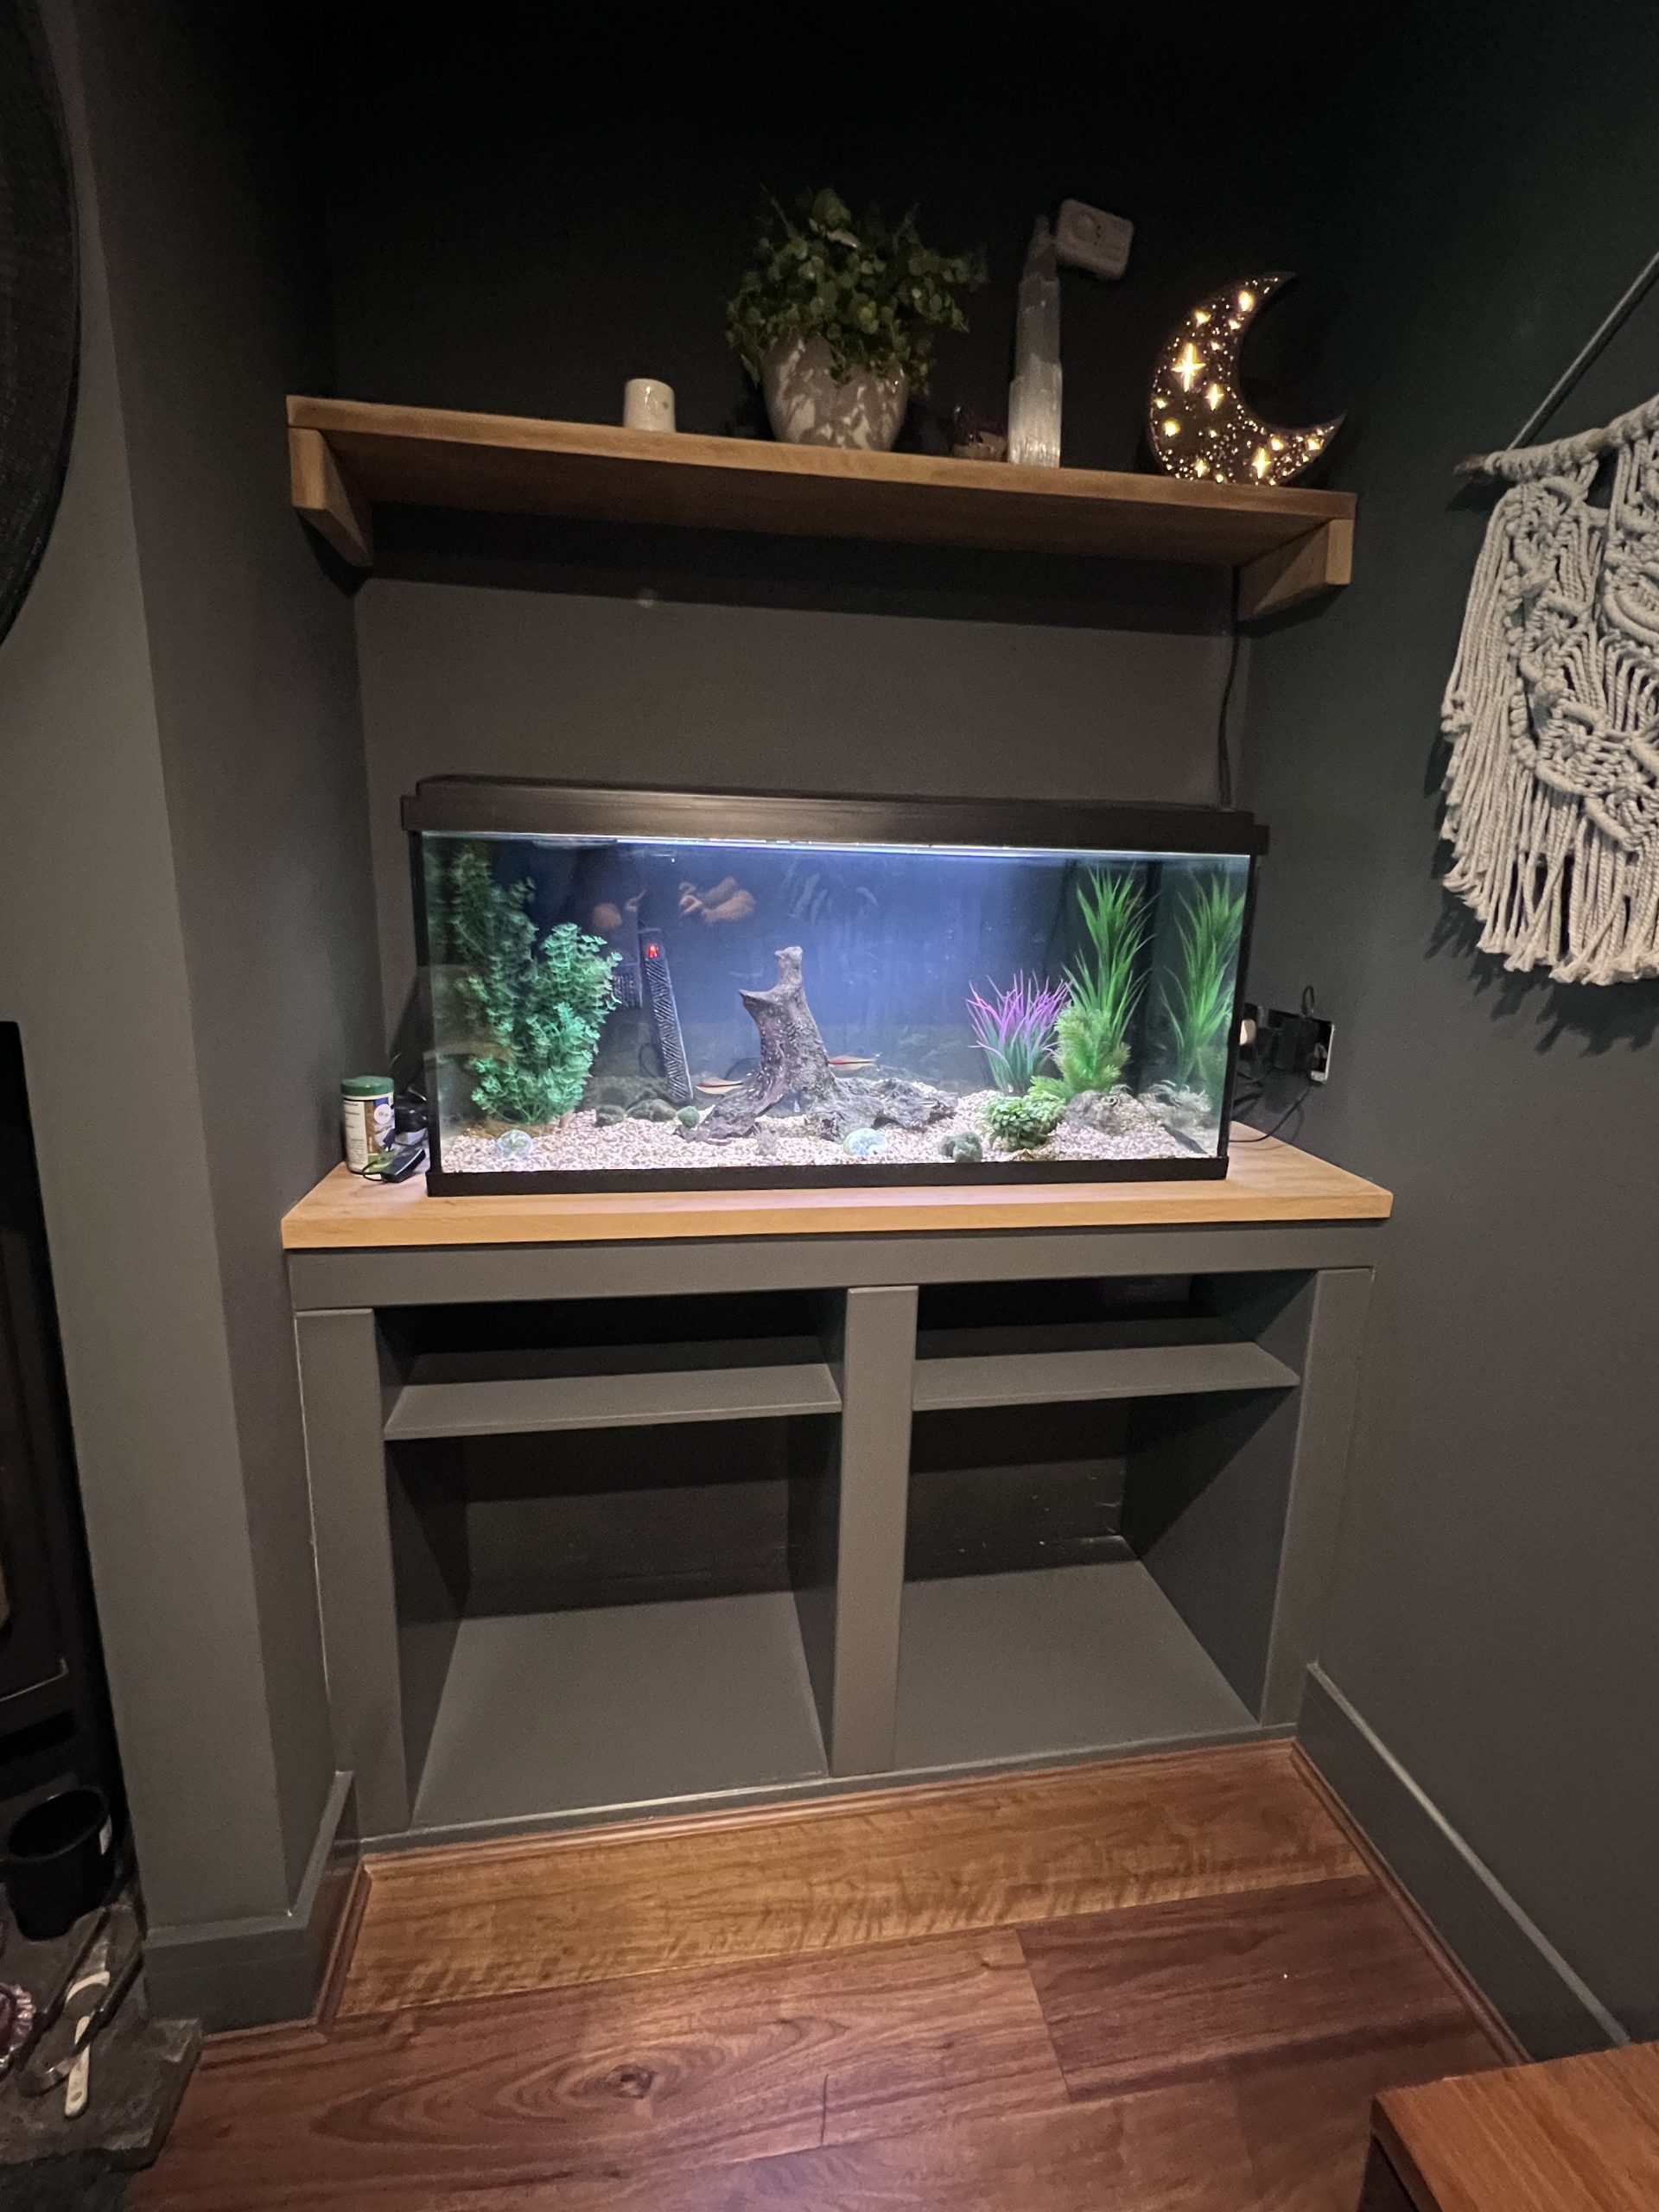
Start by determining the size of the storage unit, depending on the space available in your room and the size of your fish tank. The unit must have sufficient depth to hold a reasonable amount of logs while leaving room for shelves to store kindling. Keep the height of the unit at a comfortable level so the fish tank can be easily accessed.
For example, you might aim for the following dimensions:
- Overall Unit Dimensions: 100cm wide x 90cm high x 40cm deep
- Log Storage Space: 60cm wide x 60cm high
- Kindling Shelves: Two shelves, each 20cm high on one side
- Hardwood Top: Overhang by 1-2 cm on all sides for a polished look
Step 2: Cutting the MDF
Once your measurements are finalized, cut the MDF sheets to size. Use a table saw or circular saw for accurate cuts. You will need:
- Two side panels
- A base panel
- A back panel (optional but recommended for added stability)
- Shelves for kindling storage
- A hardwood plank for the top
Tip: MDF is easier to work with than natural wood, and it’s cheaper, making it ideal for this project. However, remember that MDF is very absorbent, so you’ll need to prep it well before painting.
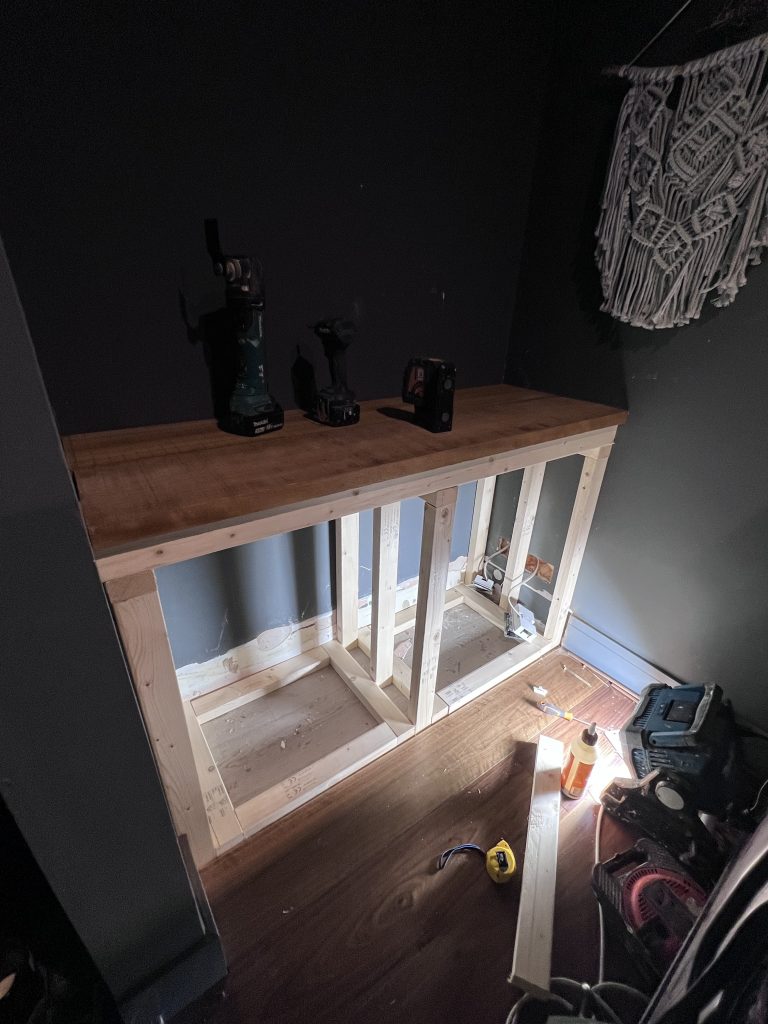
Step 3: Assemble the Frame
Assemble the unit by attaching the side panels to the base and back panel using wood glue and screws. Make sure the structure is square by using clamps and a set square. Once the base is secure, install the kindling shelves on one side of the unit, ensuring equal spacing between them.
For added strength, you can use dowels or biscuits to join the MDF pieces, but screws and glue should be strong enough if the joints are tight.
Step 4: Router the Edges
Using a router, round off the edges of the MDF to give the unit a smooth, professional look. You can also add decorative grooves or custom detailing if desired. Routing the MDF edges will also prevent chipping during use and provide a seamless surface for painting.
Step 5: Prepare the Hardwood Top
For the top of the unit, choose a hardwood that is both durable and aesthetically pleasing. Woods like oak, beech, or walnut would work well. Cut the hardwood to size, ensuring it slightly overhangs the sides of the MDF base for a polished, furniture-like appearance.
Sand the hardwood surface and edges, then apply several coats of polyurethane varnish to protect the wood and give it a rich, glossy finish. This is especially important if you’re placing a fish tank on top, as water splashes could damage unsealed wood.
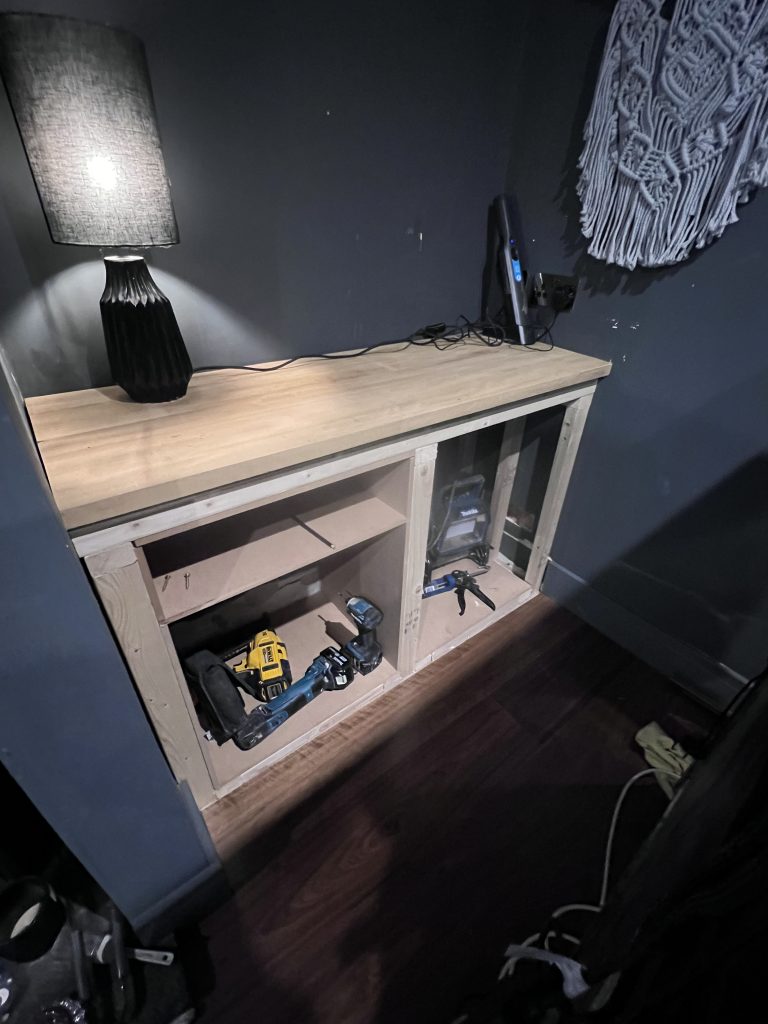
Step 6: Sand and Prime the MDF
Once the frame is fully assembled, use wood filler to smooth out any screw holes or imperfections. Allow the filler to dry, then sand the entire surface of the MDF with fine-grit sandpaper. Wipe down the surface to remove any dust, then apply a coat of primer specifically designed for MDF.
MDF tends to absorb paint, so applying a primer ensures a smooth, even finish once painted.
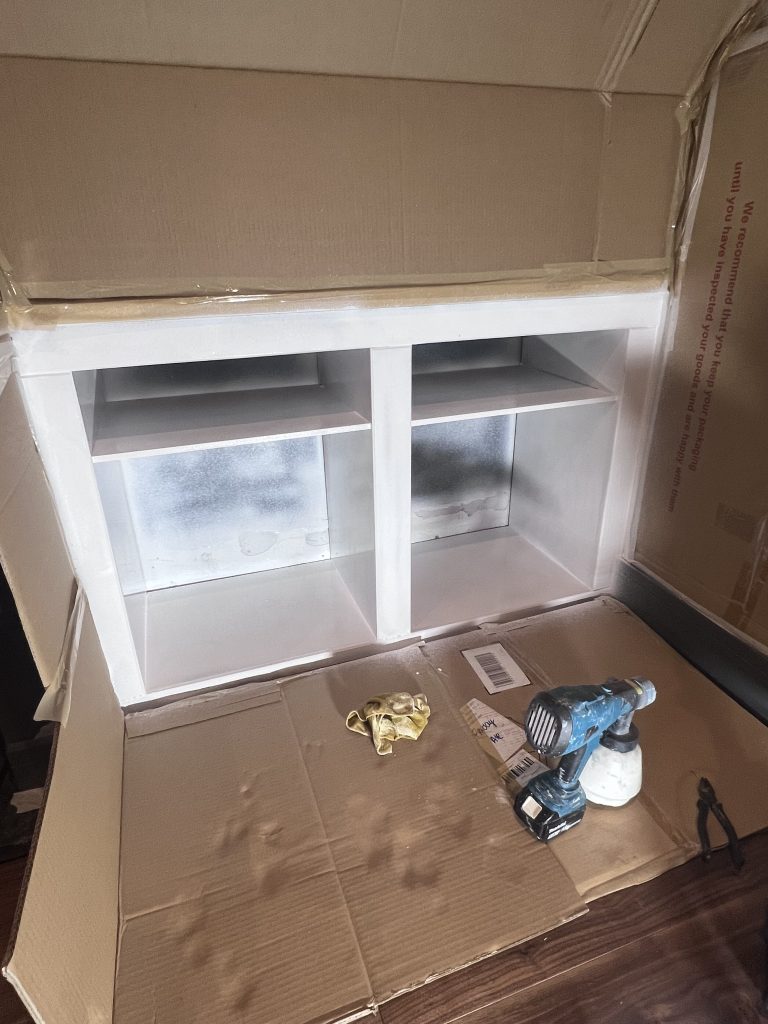
Step 7: Spray Paint the Unit
After priming, it’s time to paint! Spray painting will give your unit a professional, streak-free finish. Choose a color that matches your room’s existing color scheme. Spray multiple light coats rather than one thick coat to avoid drips. Be sure to let each coat dry fully before applying the next.
For a smooth, durable finish, consider a high-gloss or satin spray paint that complements the texture and shine of the hardwood top.
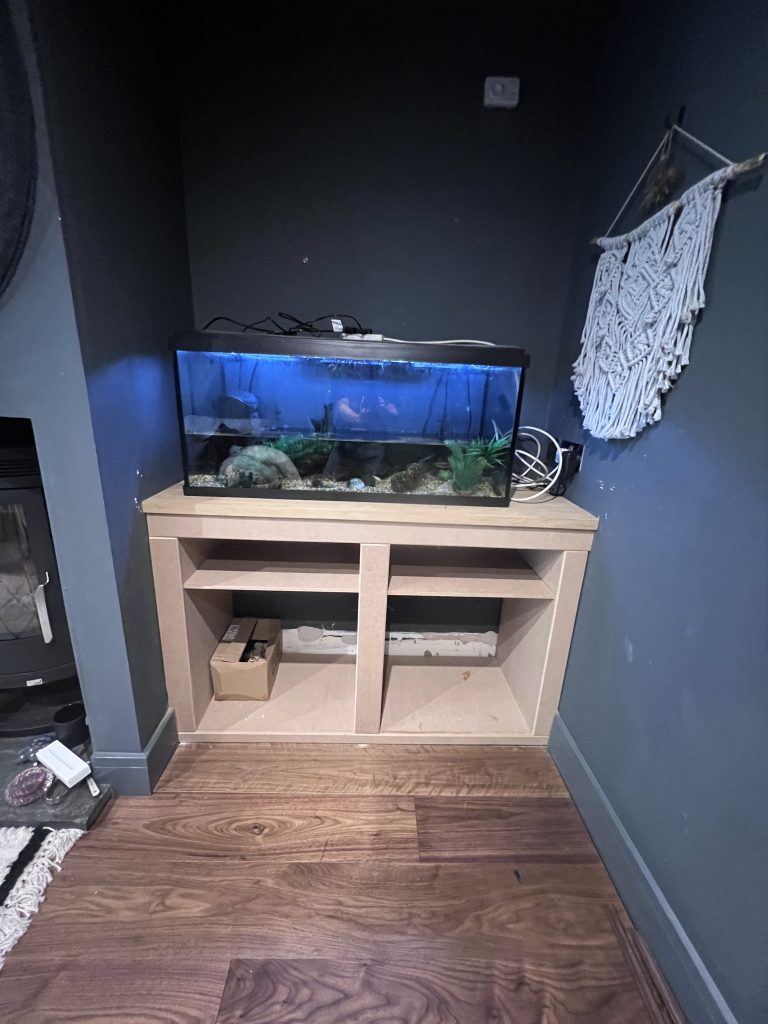
Step 8: Install the Hardwood Top
Once the paint has dried, attach the hardwood top to the unit. You can secure it with screws from underneath the MDF frame into the hardwood plank or use wood glue for a seamless finish. Just be sure to wipe off any excess glue immediately to avoid staining the wood.
Make sure the top is securely fastened, especially since it will support the weight of a fish tank.
Step 9: Add a Floating Shelf Above
To complete the look, install a matching MDF or hardwood shelf above the log storage unit. The shelf can hold decorative items, plants, or fish tank accessories. Cut the shelf to the desired size, router the edges to match the storage unit, and spray paint it in the same color.
Use wall brackets to mount the shelf securely, ensuring it can support the weight of any objects you plan to place on it.
Step 10: Final Touches
With the unit fully assembled and painted, it’s time to give it a final once-over. Ensure all edges are smooth, the paint finish is clean, and the top is firmly attached. You can also add small rubber feet to the bottom of the unit to protect your floors and elevate the piece slightly.
Conclusion
A bespoke log storage unit doesn’t just help keep your firewood organized—it can also be a stunning piece of furniture that enhances the style of your room. By incorporating kindling shelves, a durable hardwood top, and a matching shelf, this unit can become a multi-functional feature that suits both your practical and decorative needs.
Whether you’re a DIY enthusiast or a complete novice, this project is a rewarding way to add personal flair to your space. Just be sure to take your time during the design and finishing stages, and you’ll end up with a piece that’s as beautiful as it is functional.