
Wood flooring can dramatically transform the look and feel of any room, providing warmth, elegance, and timeless beauty. Recently, I had the pleasure of completing a flooring project where we replaced an old, worn-out floor with stunning Walnut tongue and groove wood. This blog post will take you through each step of the process, from preparation to the final touches, showcasing the craftsmanship and attention to detail required to achieve a flawless finish.
Step 1: Stripping the Existing Floor
The first step in our project was to remove the existing floor. This involved carefully lifting and disposing of the old flooring material. Each step was done meticulously to ensure the subfloor remained intact and ready for the new Walnut installation. Proper disposal of the old materials was also crucial, adhering to environmental guidelines.
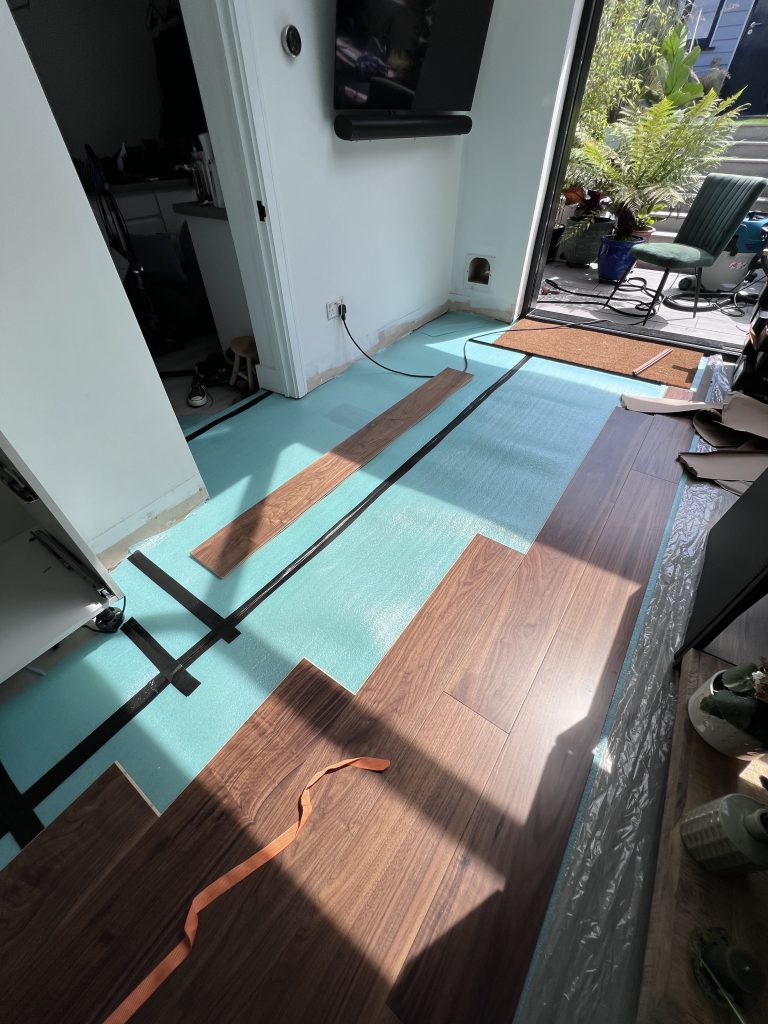
Step 2: Preparing the Subfloor
Once the old flooring was removed, we thoroughly cleaned and inspected the subfloor. Any uneven areas were leveled, and repairs were made where necessary. This preparation ensured a smooth and stable base for the new Walnut tongue and groove flooring, which is essential for a lasting installation.
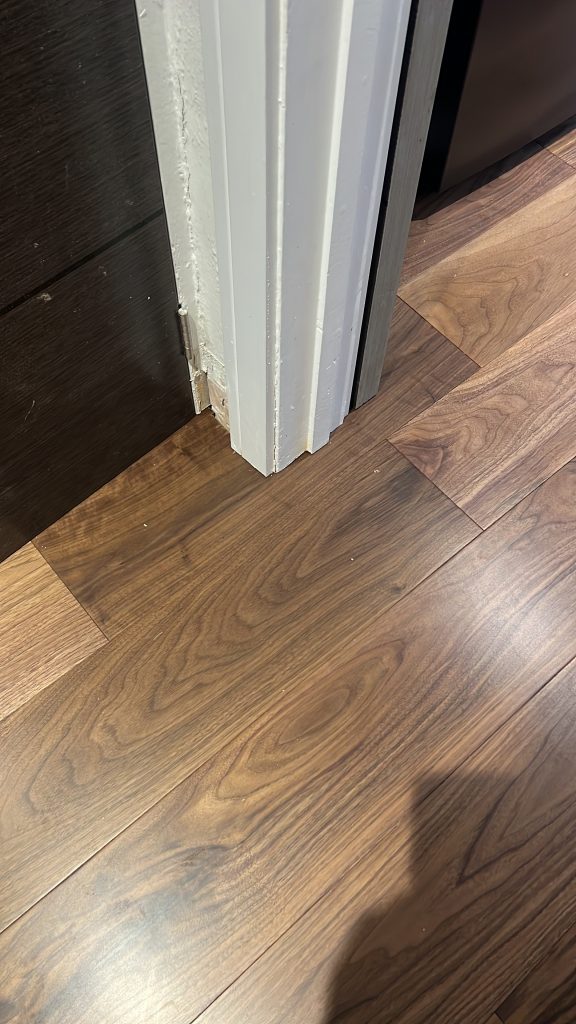
Step 3: Removing Skirtings and Trimming Doors and Architraves
To achieve a seamless look, we removed the existing skirtings so the new flooring could extend underneath. This step required careful handling to avoid damage to the walls. Additionally, we trimmed the doors and architraves to accommodate the height of the new floor, ensuring smooth transitions and preventing any obstruction.
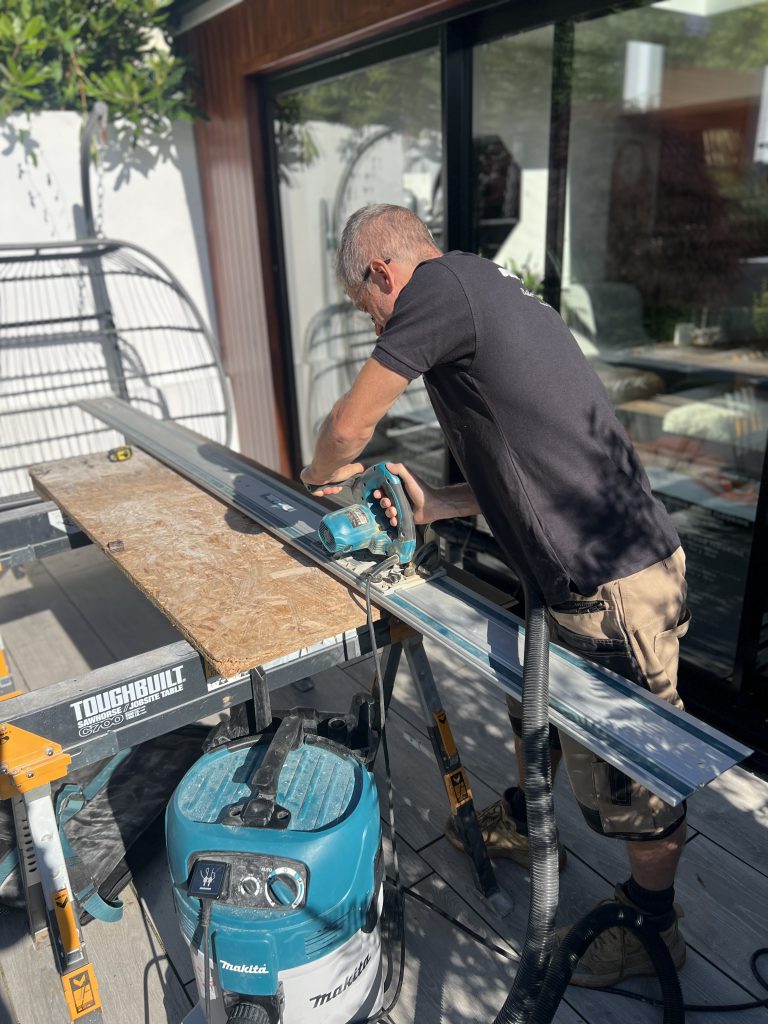
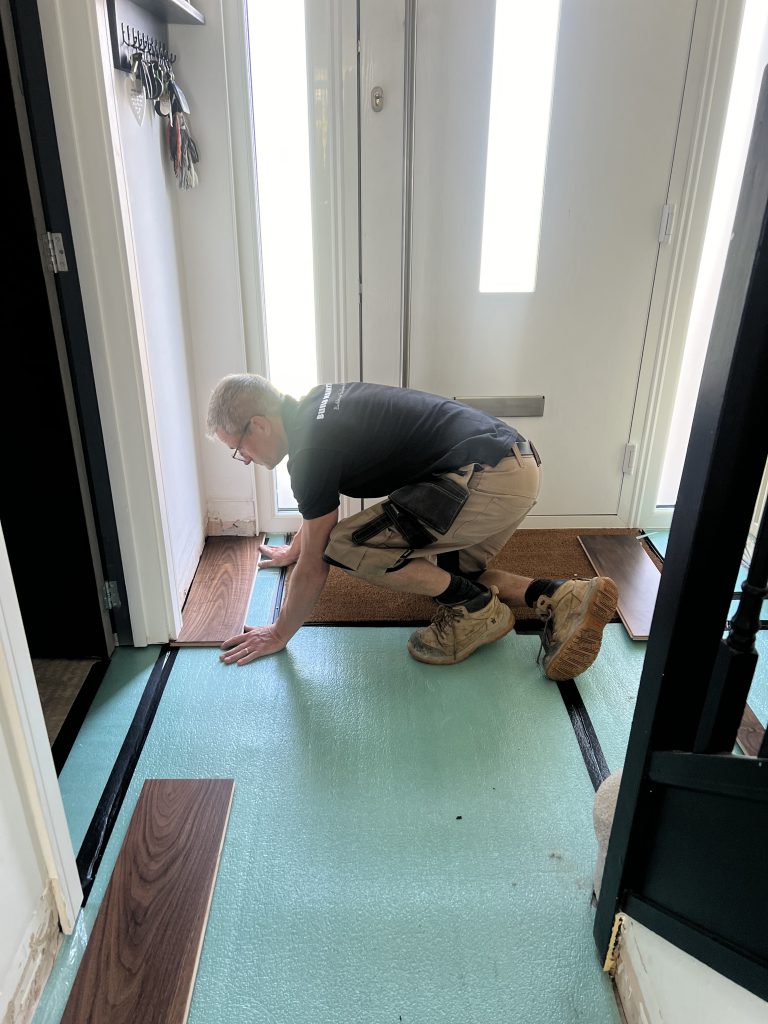
Step 4: Installing the Walnut Tongue and Groove Flooring
With the subfloor prepped and the room ready, we began installing the Walnut tongue and groove flooring. Each plank was carefully positioned and glued at the joints to ensure a tight fit and a secure bond. This method not only enhances the structural integrity of the floor but also prevents any movement or gaps over time.
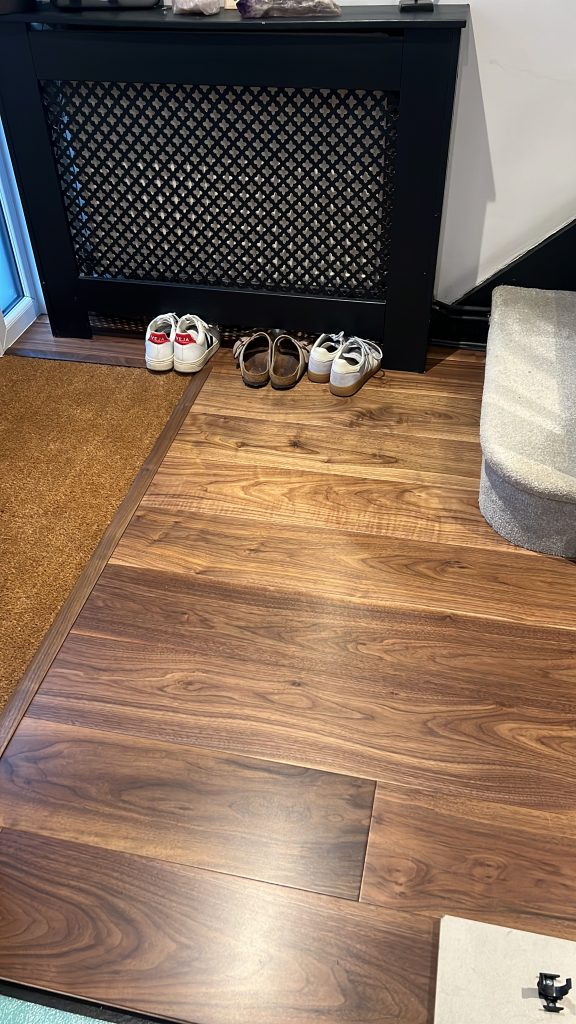
Step 5: Creating Mat Wells
To add functionality and maintain the aesthetics of the new floor, we created mat wells at the entrances. These recessed areas are designed to hold mats flush with the surrounding floor, preventing trip hazards and helping to keep the rest of the floor clean. The mat wells were carefully measured and framed, then fitted with custom-cut mats that complemented the Walnut flooring.
Step 6: Replacing the Skirtings
After the flooring was fully installed, we reattached the skirtings. This step required precision to ensure that the skirtings sat flush against the new floor and the walls, covering any expansion gaps and providing a polished look. We used high-quality skirting boards that matched the new floor’s aesthetics, enhancing the overall appearance of the room.
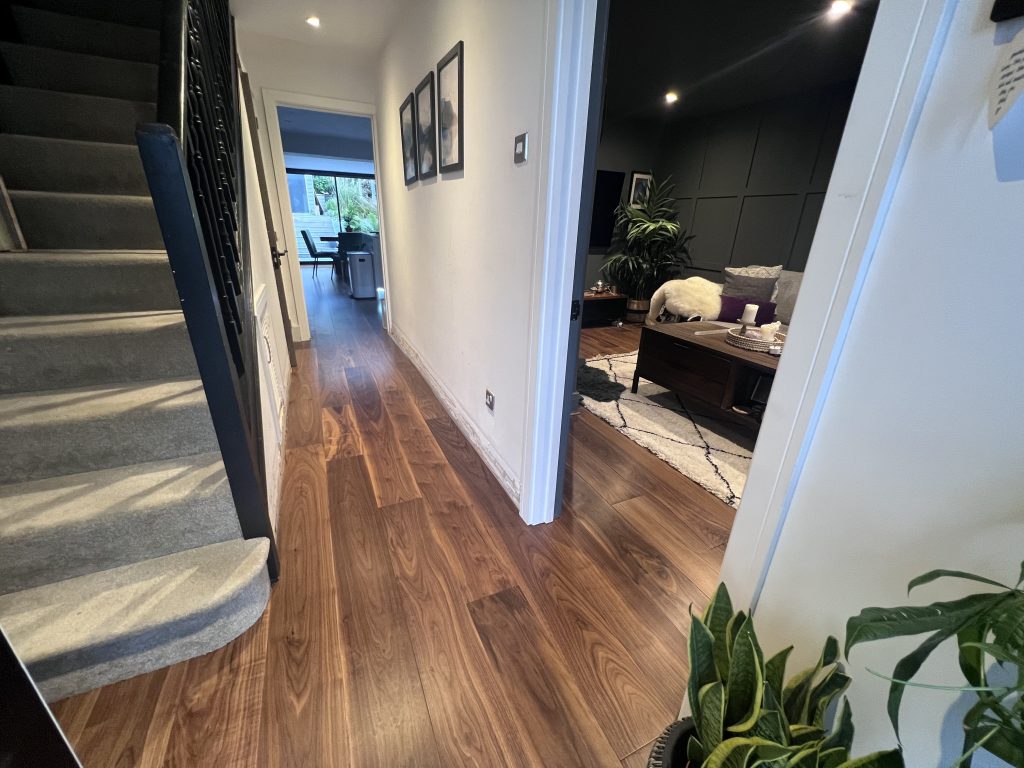
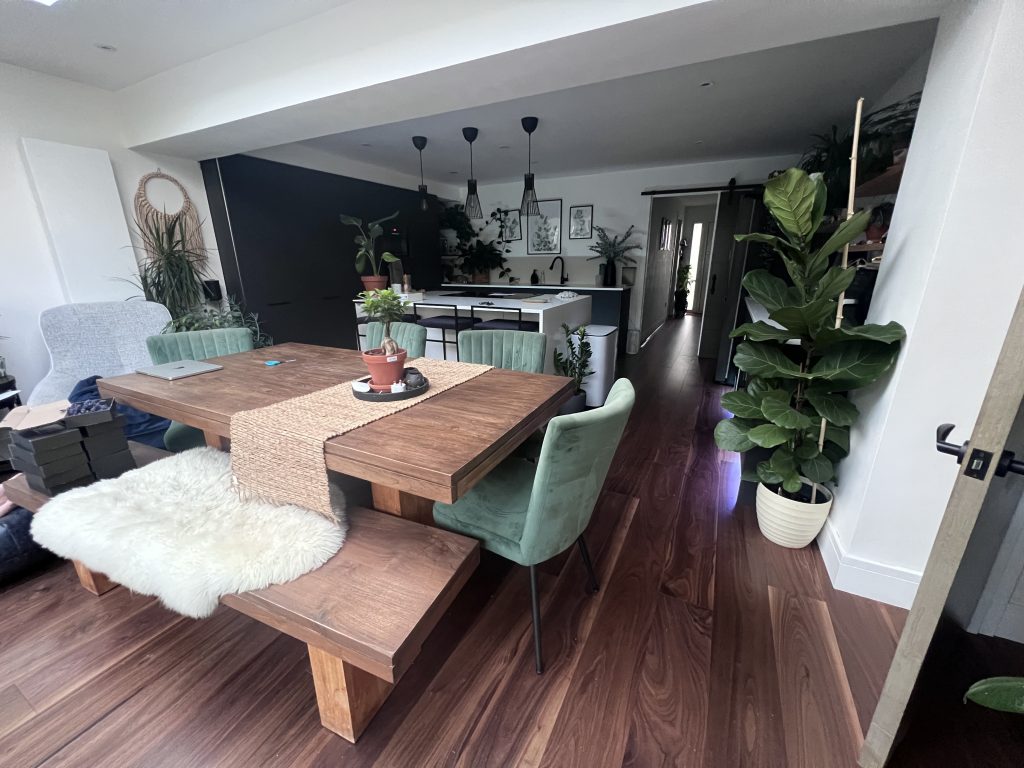
The Final Result
The transformation was remarkable. The rich, warm tones of the Walnut wood brought new life to the space, creating an inviting and sophisticated atmosphere. The seamless integration of the floor with the skirtings, doors, and architraves demonstrated the attention to detail and craftsmanship involved in the project.

Conclusion
Installing Walnut tongue and groove flooring is more than just a renovation project; it’s a craft that requires precision, patience, and a keen eye for detail. From stripping the old floor to the final touches, every step plays a crucial role in achieving a flawless finish. The end result is a beautiful, durable floor that enhances the aesthetic and functional value of the space.
Whether you’re considering a flooring project or simply appreciate the beauty of fine craftsmanship, I hope this journey through the process inspires you. Transforming a room with high-quality wood flooring is an investment in both style and substance, one that brings lasting joy and elegance to any home.